Achieving a glass-like finish on an automotive paint job depends almost entirely on the quality of your foundation. While the final clear coat provides high-gloss shine and UV protection, it is the base coat layer that provides the true color, opacity, effect flake orientation, and visual depth of the vehicle’s finish.
Spray imperfections in the base coat such as mottling, orange peel, runs, or texture bumps will carry straight through to the clear coat layer. Because base coat dries quickly to a flat, non-glossy finish, controlling application variables becomes essential for professional results.
Whether refinishing a single body panel or painting an entire custom project, mastering fluid dynamics and spray technique makes all the difference. Smooth application requires proper technique.
Here is a comprehensive technical guide on applying Base Coat Paint for Cars, dialing in spray gun equipment, managing flash-off times, and eliminating common finish defects.
1. Thorough Surface Preparation: The Key to Adhesion
A base coat will only lay down as smooth as the surface beneath it. Any lingering dust, oil residue, or rough sand scratches will distort the color layer and compromise adhesion.
[ Final Sanding (600-Grit) ] ──► Solvent Wax/Grease Wipe ──► Tack Cloth Dust Sweep
Preparation Milestones:
- Substrate Sanding: Finish prepping primed surfaces with 600-grit wet or dry sandpaper. Ultra-fine sanding marks ensure a mechanical bond without leaving visible scratches under translucent base colors.
- Degreasing: Clean the entire surface twice using a dedicated wax and grease remover. Wipe dry immediately with clean microfiber cloths to avoid trapping solvent residue.
- Static and Dust Removal: Right before spraying, wipe the panel gently with an anti-static tack rag to pick up microscopic dust particles and discharge static electricity that pulls airborne contamination onto the panel.
2. Spray Gun Setup and Fluid Calibration
Using a High-Volume, Low-Pressure (HVLP) spray gun provides maximum transfer efficiency and atomization control. However, incorrect nozzle sizes or air pressure settings are the leading causes of uneven texture.
┌─────────────────────────────────────────────────────────────────────────────┐
│                    HVLP SPRAY GUN SETUP GUIDELINES                          │
├──────────────────────────────┼──────────────────────────────────────────────┤
│ Setting Parameter            │ Recommended Base Coat Configuration          │
├──────────────────────────────┼──────────────────────────────────────────────┤
│ **Fluid Tip / Nozzle Size**  │ 1.3mm to 1.4mm needle and nozzle set.        │
├──────────────────────────────┼──────────────────────────────────────────────┤
│ **At-Gun Air Pressure**      │ 26 to 29 PSI (per manufacturer specs).       │
├──────────────────────────────┼──────────────────────────────────────────────┤
│ **Fan Pattern Width**        │ Fully open fan, choked back 1/2 turn.        │
├──────────────────────────────┼──────────────────────────────────────────────┤
│ **Fluid Control Knob**       │ 2 to 2.5 turns out from fully closed.        │
└──────────────────────────────┴──────────────────────────────────────────────┘
Matching the reducer speed to the ambient shop temperature is equally critical. Using a fast reducer in warm weather causes paint droplets to dry mid-air before flattening on the panel, creating dry overspray and rough texture.
3. Disciplined Spraying Technique and Overlap Patterns
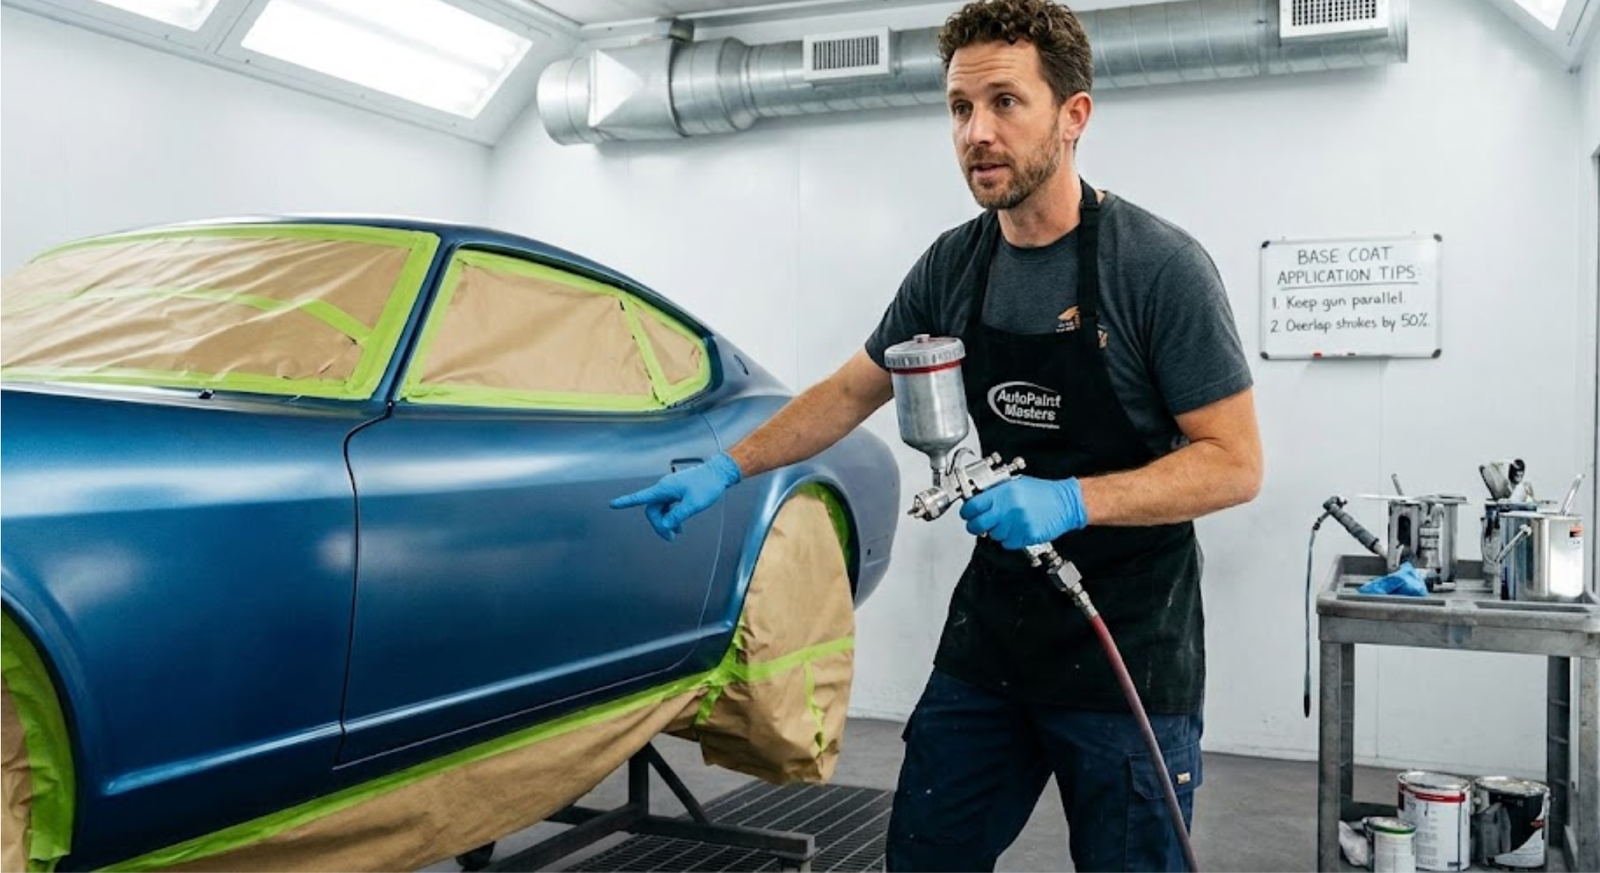
Maintaining consistent physical distance, speed, and angle relative to the body panel ensures an even film build across the surface.
[ 6 to 8 Inches Distance ] ──► 50% to 75% Pass Overlap ──► Parallel Travel Speed
- Gun Distance and Angle: Keep the spray tip perpendicular ($90^\circ$) to the panel at a consistent distance of 6 to 8 inches. Tilting the spray gun leads to uneven film thickness.
- Pass Overlap: Overlap each spray stroke by 50% to 75%. This guarantees uniform coverage and prevents faint streaks or “zebra striping.”
- Triggering: Pull the trigger off the panel edge before moving across the surface, and release the trigger only after passing the opposite edge.
4. Managing Flash-Off Times Between Coats
Base coat paint is engineered to flash off evaporating its liquid solvent carriers rapidly. Applying a second coat before the first layer has properly flashed off traps solvents underneath, causing sags, loss of adhesion, and metallic mottling.
| Coat Stage | Typical Flash Time | Visual Appearance Indicator |
| First Medium Pass | 10 to 15 minutes | Wet glossy look shifts to a completely uniform matte/flat finish. |
| Second Coverage Pass | 10 to 15 minutes | Full color hiding achieved; dry to a touch-safe flat state. |
| Drop Coat (Metallic/Pearl) | 15 to 20 minutes | Light mist coat fully flashed before applying clear coat. |
Always verify that the paint has flashed to a uniform flat finish before applying the next coat or spraying the top clear coat layer.
5. Controlling Metallic Flakes with a Drop Coat
When spraying metallic or pearlescent base coats, heavy wet coats can cause metallic flakes to sink or bunch up, creating dark patches known as mottling.
To fix this, apply a final drop coat (or orientation coat):
- Reduce gun inlet pressure slightly by 2 to 3 PSI.
- Step back an extra 2 to 4 inches from the panel.
- Spray a light, crisscross mist pass over the wet base coat.
This light mist allows aluminum flakes to drop evenly onto the wet paint film and lock into place parallel to the substrate, producing a uniform factory-style metallic effect.
Conclusion
A smooth automotive paint job relies on precise technique during the base coat stage. By preparing the substrate thoroughly, configuring your HVLP equipment for ideal atomization, maintaining disciplined pass overlap, and respecting flash-off times, you create a flat, flawless color foundation ready for a crystal-clear top coat.
Ready to elevate your refinishing projects with premium base coat formulas, reducers, and professional color matching supplies? Explore technical refinishing products and expert application guides at Automotive Base Coat today.
Frequently Asked Questions (FAQ)
Q: Should base coat paint be sanded before clear coat application?
A: No. Base coat is formulated to chemically bond with clear coat applied directly over it. Sanding base coat disrupts color alignment and metallic flake orientation. Only denib light dust spots with 1000-grit dry paper if necessary, then re-spray a light coat of base color over the area before clear coating.
Q: How long can I wait after spraying base coat before applying clear coat?
A: Most base coat systems have a maximum recoat window of 24 hours. If you exceed this window, the base coat will lose its chemical bonding capability, requiring you to scuff the panel and apply another coat of base color.
Q: Why is my metallic base coat showing dark streaks and mottling?
A: Mottling occurs when paint is applied too wet, gun distance is too close, or a reducer that is too slow is used. Applying a light drop coat at slightly lower pressure and increased distance fixes flake alignment.